Photoshop
Lomo照相机和宝丽来老式效果之Photoshop教程

{在网上看到的一篇非常好的关于Lomo和Polaroid的文章,分享给大家,可惜是英文的,希望能有哪位英文高手可以翻译下:D}
Since its emergence, the digital photography market has gradually supplanted the traditional one. APN and digital SLR cameras entered our lives, and some people announced the death of silver-based images. This is not all lie, and yet old-fashioned images have been particularly popular in the past few years. All we do seem to do now is try to recreate the atmosphere of those bygone times anyway. Blurry, distorted and over-saturated images are not just a fad anymore. People have became familiar with the style and even consider it a full-fledged photographic genre.
And this is where toy cameras play a role. These devices, made entirely of plastic, including often the lens itself, are not only toys. Sure, they cost next to nothing and have no controls to speak of, but this is what people like about them: they create unpredictable pictures, with equally unpredictable vintage effects. Once you understand this, the rest is a beautiful game. Take them anywhere, anytime, and photograph whatever you like.

Photo credit: Pirouetting, by helenannsia
How does this apply to modern design? Now that vintage websites are so trendy, why not look to this type of image for inspiration? You probably don’t want to go through the trouble of taking up silver-based photography because that would mean buying, developing and scanning film, maybe even making prints. That takes time and is expensive.
What you can do, though, is use the magic of Photoshop to make your ultra-sharp, high-definition images look like they were taken with one of these cameras. Below are a list of the most famous toy cameras and some tutorials that can be used to recreate their famous effects. Most of them are part of the Lomography movement, but you might also want to consider some other options in trying to recreate that authentic look. You also may be interested in our previous article “The Disturbing Beauty of Oversaturated Pictures and Lomography.”
[By the way: The network tab (on the top of the page) is updated several times a day. It features manually selected articles from the best web design blogs!]
Famous Toy Cameras
Toy cameras are cheap, low quality and yet functional. As such, the deformations in the photos they produce are pronounced, and not all images are guaranteed to be perfectly exposed. Still, there are just so many of them these days that picking a few is hard. The ones presented here have paved the way for the success of the others. You may know them but not the stories behind them?
Diana
Let’s start where it all began. Picture yourself in Hong Kong in the early ’60s, when a factory starts producing the Diana. This inexpensive plastic-body camera was at the time usually given away as a novelty gift. Occasionally, it would be used by actual photographers who took advantage of the various effects it produced. And many effects there were. Because of the poor quality of materials used, the Diana camera was disposed to light leaks, leading to film damage, an effect typically fixed by sealing the seams with light-proof tape. Handy, huh?
But the plastic body wasn’t the most interesting part: it was the lens, also made out of plastic. Not only did it enhance the already low contrast created by the light infiltration, but it also made for odd color rendering, chromatic aberration and blurry images. As if this weren’t enough, the image circle only marginally covered the diagonal of the film frame, which is why Diana images have heaving vignetting.

Photo credit: elZekah
As photographers started to deliberately exploit these characteristics, production grew through the ’70s and opened the way for other toy camera manufacturers.

Photo credit: chomdee
Lomo LC-A
This is where things get a bit tricky, so pay attention. It’s now the beginning of the ’90s, and for a few years the Russian factory Lomo PLC has been producing the Lomo LC-A camera, which basically has all of the characteristics of a toy camera (vignetting in particular). But production was stopped, and the camera was all but forgotten until two Austrian students found one at a flea market in 1991 and decided to exploit its marketing potential. They convinced the director of the Lomo PLC factory to relaunch production and negotiated an exclusive contract for distribution with their brand-new company: Lomography AG.

Photo credit: maaku
And here begins the Lomography movement. If the term is familiar to you, you probably know at least two things about it. First, it promotes casual snapshot photography. Second, it is associated with over-saturated and high-contrast images. To confuse things, this second characteristic has nothing to do with the LC-A camera itself or with any other cameras for that matter. It is actually the result of the way the film is processed, which would usually be cross-processing. But Lomography is a movement, not a technique, and it was certainly the first to promote camera imperfections as an aesthetic. The success of the LC-A camera helped spread this aesthetic.

Photo credit: citronnade
Holga
With the success of this movement, Lomography AG became interested in other low-cost cameras, such as the Holga, which had been produced in China for a decade. Even though it was made by a different manufacturer, the Holga was considered the successor of the Diana. Inspired by its predecessor, the Holga was designed as an inexpensive mass-market camera. And like the Diana, it is not of the best quality and has the same flaws.

Photo credit: babyabby10
But the Holga became popular and was even exported to the West over time, mostly for photo-reporting, for which its low profile was appreciated. Its problems were no longer problems, and now it is not surprising to hear of Holga photos winning awards. Because it is entirely manual, one can create effects, such as double exposure and panoramas, by not winding the film.

Photo credit: Bill Hansen (website)
ActionSampler, SuperSampler, Oktomat
These three cameras don’t have many differences. They all take multiple shots in a set period of time, thus creating micro-images that look like short animated movies. The Actionsampler and Supersampler have four lenses each, while the Oktomat has eight, fitting eight frames into the standard 35mm.

Photo credit: amylynnthompson
To make them a bit more fun, what you see through the viewfinder is not exactly what you get.

Photo credit: golfpunkgirl
Lomo Fisheye 2
As the name suggests, the Lomo Fisheye camera has a fish-eye lens. It was the first 35mm compact camera to offer such a wide angle (170°), and unlike the other toy cameras covered here, it gave surprisingly good results for the price. The second edition came with several enhancements, such a viewfinder that covered the same angle as the lens (it was blocked off before).

Photo credit: aapnootmies
The effect created, often seen in sport images, can serve many other purposes. But the user should be aware of two major characteristics: strong deformation and light leaks.

Photo credit: faha
Photoshop教程和资源
Now, let’s put all this into practice. Even if you are familiar with these effects, have ever actually tried to replicate them? There are a lot of different effects, and you can combine them to create unique images.
Faking the Holga Camera and Fisheye Lens
How to Fake a Holga Photograph
This tutorial shows you how to fake Holga photographs in a few simple steps.
Another Way to Fake a Holga Photograph
Another tutorial on faking Holga photographs.
Fish-eye effect
This shows you how to create a fish-eye effect for a picture taken with a regular lens. This one is a video and it addresses two important points: the lens circle border is not supposed to be so sharp when taking a fish-eye photograph, and one often deals with light infiltration.
Fish-eye effect
Another fish-eye tutorial. It doesn’t show how to distort the image, so you will have to add this step yourself, but it adds a nice final touch to the image by using a picture of the inside of a fish-eye lens.
Recreating Low-Quality Camera Flaws
Vignetting
A very simple tutorial on recreating the vignetting effect.
Soft-Focus Lens Effect
What if you’re already happy with the contrast and color saturation of your image and just want to recreate the effect of a soft-focus camera lens or diffusion filter? In this tutorial, you’ll learn a fast and easy way to add a more traditional soft-focus lens effect to images.
Faking Barrel Distortion and Chromatic Aberrations
Here is a nice Photoshop plug-in to fake barrel distortion and chromatic aberrations. Adding these effects to your pictures will make them look even more authentic.
Light Leaks Effect, Part 1 and Part 2
Of course, this article wouldn’t be complete without a great tutorial on light leak effects. Here is an awesome one, divided into two parts, each covering a different effect: a white-blur light and a colored bar leak.
Working on Colors and Light Exposure
Getting That X-Pro Lomo Look
This tutorial is fairly quick and easy. It shows you how to get that great x-pro Lomo look by tweaking color. You’ll be exploring a new method of vignetting, and you’ll be widening and blurring the image a little.
Cross-Processing Tutorial
With so many possible permutations of film stock and processing techniques, there is no single, identifiable look to cross-processed images. The most common combination is C-41 as E-6, in which slide chemistry is used to process color negative film; and mimicking it in Photoshop is a quick job. Image contrast is usually high, with blown-out highlights, while shadows tend towards dense shades of blue. Reds tend to be magenta, lips almost purple and highlights normally have a yellow-green tinge.
Cross-Processing
Another cros-processing tutorial.
Vintage Effect
Age your images a give them a vintage effect.
Using Textures and Double Exposure
Through the Viewfinder
Did you know that Flickr has a Through the Viewfinder group? The idea is that you shoot through the viewfinder of an old camera using your modern digital or film camera and create an interesting framing effect. Here is a tutorial on how to create this effect.
Resources of Speckle Pattern
Yes, there is also a Flickr group called “Noise and Dust Through the Viewfinder.”
Paper Texture Effect
Here is a quick and easy tutorial for those who want to learn the art of taking a photo and turning it into an old-fashioned vintage picture.
Some More Paper Texture Effect
Another tutorial (this one a video).
Filmstrip Effect
Download a filmstrip template and use it to create negatives of your pictures.
Double Exposure
When you take a double-exposed photograph, the results are usually a bit unpredictable. With Photoshop you have much more control over the result.
Another Way to Create Double Exposure
While the most common way to create a double exposure is by using a different blending mode on the top layer and adjusting its opacity, this method accurately simulates how a camera takes a double exposure.
Other Ideas
No tutorials are needed to create these effects. They are included here merely to give you more ideas. You’ll still need to work on your pictures to get that vintage look. Then, just put them together and enjoy.
Shoot Series Like the Oktomat and the Actionsampler
Draw inspiration from the Oktomat and Actionsampler cameras. You’ll get either four or eight images in the same frame, each of them having been shot after an interval of only a few seconds.

Photo credit: Look!, by Moyö
Shoot Series like the Supersampler
The Supersampler effect is quite similar to the Actionsampler: four images in the same frame, but spaced differently. And remember that you can arrange layers both horizontally and vertically.

Photo credit: moving clocks run slow, by aleinsomniac
Panorama 1
Panorama images don’t necessarily have to be perfectly arranged. Here is an example of what else can be done.

Photo credit: Christophe Dillinger (website)
Panorama 2
Another inspiring panorama.

Photo credit: bruceberrien
Panorama 3
The panorama view can be combined with a filmstrip effect. It simulates a double-exposure panorama taken on a manual camera.

Photo credit: mikrofoniusz
想要更多!?
Polaroid
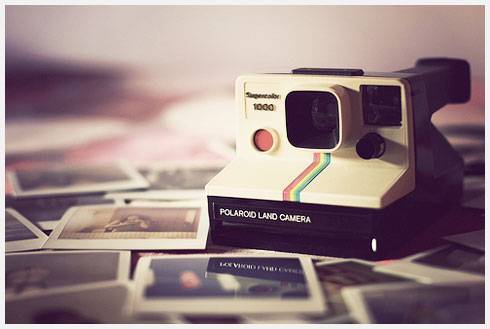
If cheapness is a defining characteristic of toy cameras, it surely isn’t for Polaroids. The Polaroid camera itself is not expensive, but because Fuji is now the only company that produces the film for it, getting affordable ones has become difficult. But this may change in the next few months thanks to the Impossible Project.
Going back a bit, the world’s first commercial instant camera was the “Land” camera, unveiled in 1947. Since then, Polaroid has become synonymous with instant photography, because most of the cameras have been created by the Polaroid Corporation. Nowadays, the cameras are used by photographers mainly to preview their work before actually shooting. But as toy cameras, they are fun to play with and can make for nice effects.

Photo credit: paine666
Polaroid and Transfer Effect
Retro Polaroid Coloring on Your Photos
This is a simple tutorial on how to get that retro Polaroid coloring in your photos.
Polaroid Transfer Effect
This Photoshop tutorial shows you how to create a cool old photo transfer edge effect using a piece of stock photography, an alpha channel and the burn and dodge tools.
Showcase of Beautiful Pictures
Considering that Flickr has a group for almost every subject, it is no surprise that there is one for toy cameras. Here is a showcase of the most beautiful images from it.

Photo credit: have I told you lately, by cHr1st1an S

Photo credit: ubu84

Photo credit: 000038, by qwj

Photo credit: 54330027, by etara

Photo credit: Ipanema Beach – Brazil, by marcelo_maia
Photo credit: Hélicoïdal, by Cathy Lehnebach

Photo credit: Purgatoire, by stiveune

Photo credit: untitled, by Greg Zauswoz

Photo credit: untitled, by bradbrochill

Photo credit: .., by cjlomo

Photo credit: spree1, by hellomelly

Photo credit: Love me two times, by laszlo_ototh

Photo credit: exit, by renaishashin

Photo credit: untitled, by Sergio Conde Sánchez

Photo credit: Akhirnya buat lomba juga -__-, by febryanyovi

Photo credit: Cosy Clausterphobia, by miss_michelle

Photo credit: svema_test1, by ashtonleee

Photo credit: untitled, by poppart

Photo credit: lomographicsocietyinternational

Photo credit: La Bòfia – Redscale, by fgali1964

Photo credit: chomdee

Photo credit: offcenter

Photo credit: Holga Tennis, by Nick Whitmoyer

Photo credit: golfpunkgirl

Photo credit: eyetwist
更多的资源
Old Toy Camera – Photoshop action
This Photoshop action makes images look as though they are aged prints, shot on a toy or antique camera. Also included are two actions that create borders similar to those seen on photos from many antique and toy cameras.
Toy Camera Contest
FILE presents here a selection of images submitted for its Toy Camera Contest. This collection gives an idea of the challenge facing the judges to find three winners. The range and quality of the submitted images are impressive.
Gallery
This project is home to photos taken with toy cameras. Most are plastic: Holga, Diana, Dorie, Debonair, Lubitel, Banner, Snappy and Yunon. Distortion, blur and imperfection are some of the characteristics that endear these cameras to enthusiasts.
Abduzeedo: 60 Interesting Lomo Fisheye Shots
Gathered here are a few Lomography fish-eye shots. Some were taken with Lomography cameras such as the Diana and the LC-A+ with a fish-eye lens adapter attached.
Lomography.com
Lomographic Society International Website.
本文由 Jackchen Design 1984 作者:jackchen 发表,转载请注明来源!


